Crossed my line a few times and it's not as small as it should be but overall I'm pretty happy with it! More tomorrow!
Monday, January 27, 2014
Sunday, January 26, 2014
Finished the outline quilting on Heart Flower and Feathers :)
Just wanted to share a picture of my finished outline stitching on the little Heart Flowers and Feather Wholecloth Quilt. Pretty happy with it, a few mistakes here and there, but overall I'm pretty stoked. Tomorrow and Tuesday I will work on some filling with micro-stippling.
Saturday, January 25, 2014
Heart Flower and Feathers Wholecloth Quilt!
In the beginning of December 2013, the snow was blowing and I was unable (or unwilling due to the temperature) to spend my time in my usual pursuit of riding my horses. I started thinking about why I had not really gotten to any of the quilting projects I had wanted to do and had already purchased fabric for. I honed in on the answer that I was unmotivated to create the tops I had planned on making because I didn't know how to quilt them. I am a beginner at sewing and quilting and while piecing didn't give me any pause, I was just at a loss on how to really quilt a quilt myself. I didn't really *want* to send them out for quilting, nor could I really afford to. So after some searching around online I came across Leah Day's Free Motion Quilting Project.
I began voraciously watching her many online tutorials on YouTube and I was hooked. One part of the 2012 Quilt Along I just loved was the Heart Flower and Feathers Wholecloth Quilt. I really wanted to try it out, so after doing a couple of the 2014 Building Blocks Quilt Along that I am participating in right now, I decided to give it a try! It may be the first of a few because I know the first one (or two) won't be perfect and I really love this little quilt and want a nice one to hang on my wall in my sewing room. I am sure going to learn a ton by doing this little wholecloth quilt - I could even keep them unbound and then eventually bind them together to make a table runner. How cute would that be!
Thursday I prewashed and dried my fabrics and ironed and starched them, Friday evening I marked my fabric with the motif and basted it and today I got started quilting it. I've made a couple mistakes on the curves of the hearts, but I don't think they will be too noticeable once I add the micro-stippling filler. I am so thrilled to actually be working on this. The weather has been absolutely frigid here, single digits and sub-zero and looks to stay that way through the middle of the coming week, so I will have plenty of time to work on it!!
Here is a photo of it marked and basted and another two of it after I quilted the center heart flower and overlapping square rings. Not too shabby!! The splotches, like in the center indent of one of the hearts is from my marking pen when it was going over top of the scotch tape I used to put together the four pieces of paper that make up the entire motif. It should come out with water.


New Year, New Sewing Room!
Part of the reason I had not continued with learning how to sew and quilt in years past was the condition of the area where my sewing stuff was located. It was dark, unwelcoming, disorganized, and without good work stations. So around the middle of December I decided - Thats it! I am fixing this situation. Since our house doesn't have a basement or attic, all the "stuff" that has no where else to go would end up getting thrown into my "studio." So, the first step was a major purge and reorganizing.
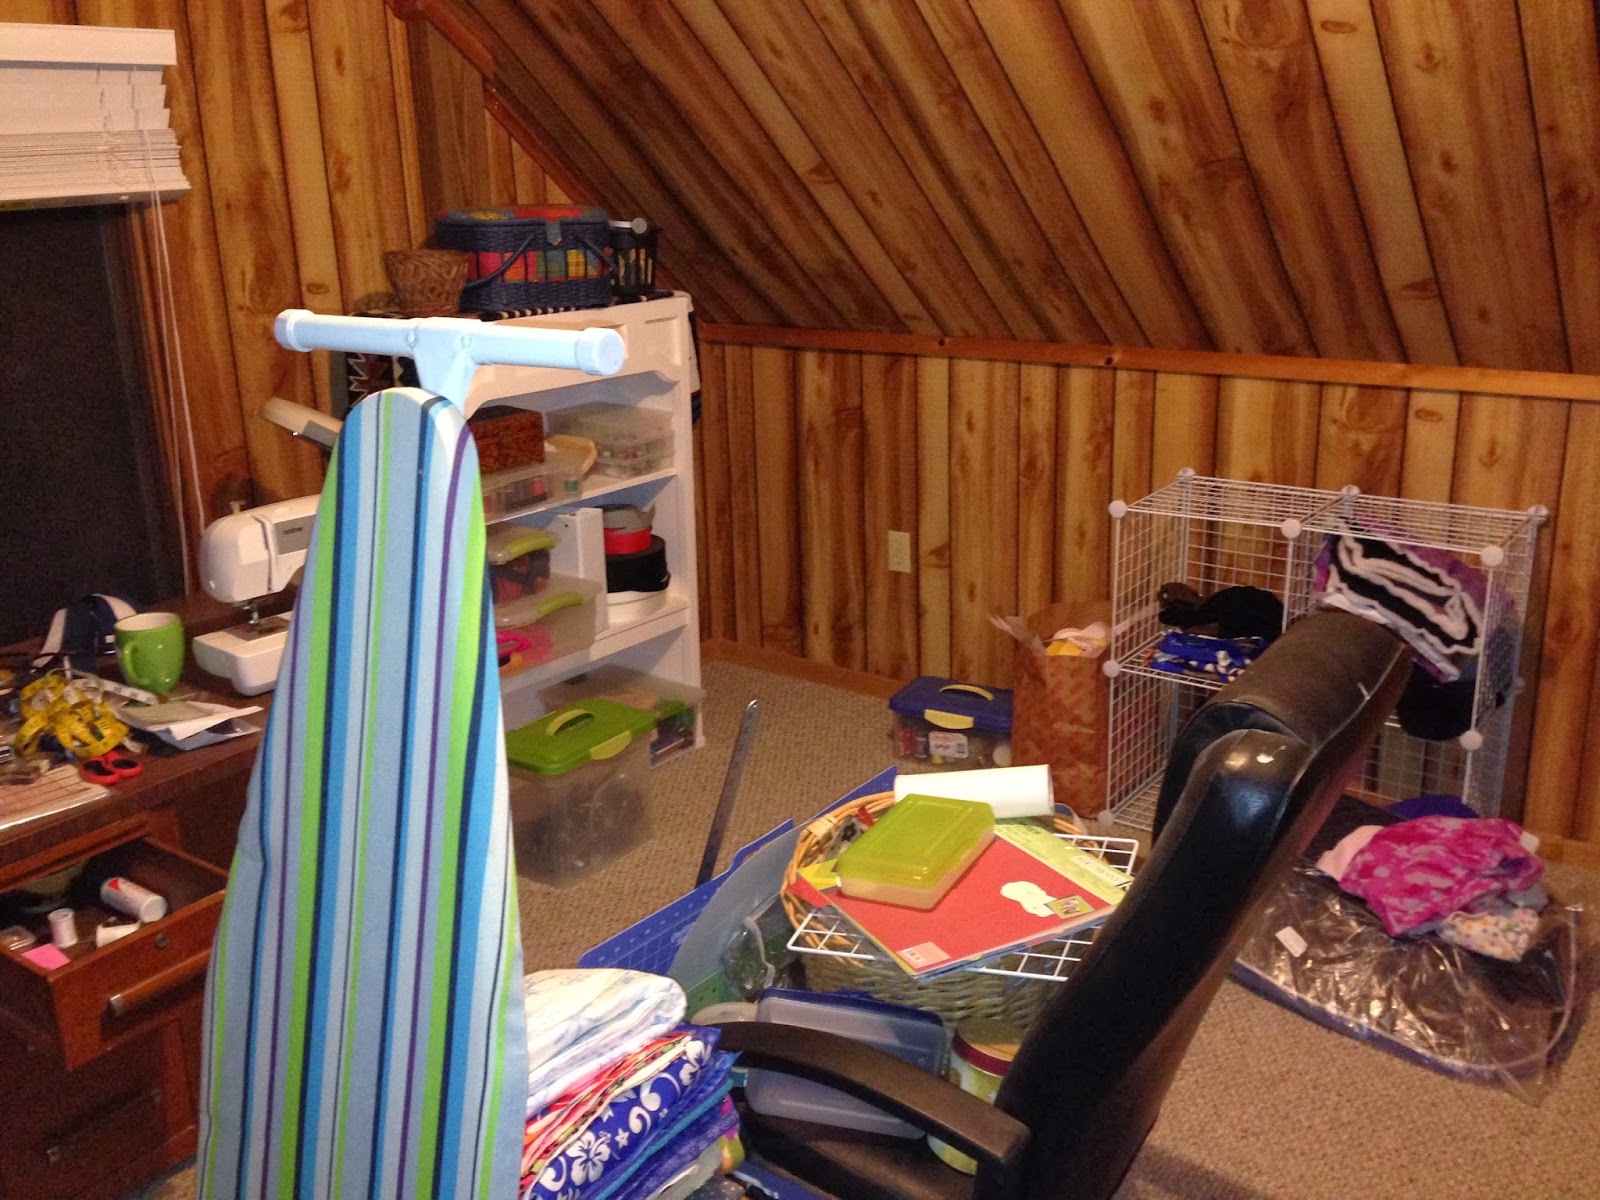
Here it is before the makeover, but after the purge:
So I just wanted to add this post, to remember this process and what happened in the very end of 2013 and beginning of 2014! New Year, New Sewing Room, New Adventures!
Here it is before the makeover, but after the purge:
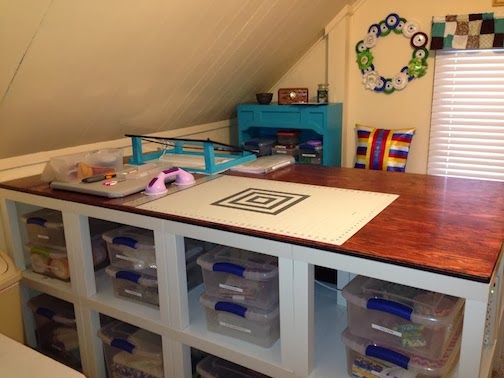
The next steps were painting the room (I hate fake wood paneling), figuring out the layout of the room and constructing a large work table. I found an online IKEA hack using their Lack Tables, which are small side tables and putting them together to make a large work space. Here are some in progress pictures:
I also built a Light Box:
In addition to the Light Box, I got a frame for a beautiful piece of art that was a gift from the artist when I was child. I also sewed a curtain, chair cushions and a pillow. Other than that I made a new top for my ironing board and a smaller 18 x 18 press board that I can have at the work table for when I am piecing or whatnot. I have my Huskystar C10 set up as a Free Motion Quilting Machine in the Gidget 2 sewing table, with the Queen Supreme Slider mat and a modified generic free motion quilting foot. I following Leah Day's tutorial on how to modify the foot. I have my Brother Project Runway LE for piecing and regular sewing, which I can move onto the big work table or have at the brown desk, depending on what I feel like.
Here are photos of the room basically finished:
I am super excited and have already made a bunch of things in the room like my BBQA blocks, a few ribbon belts, ribbon pillow and wreath, scissor/tool cases, and next is a small FMQ Wholecloth Quilt project from some of Leah Day's old videos. I just loved it and I wanted to make it.
Pictures of what I have made so far in my new studio!
Finished The Big Bag!
I decided to make a huge bag to carry all my stuff to a quilting class I am taking in February at a local shop. I used the Missouri Star Quilt Company you tube tutorial titled "Three Big Bags From One Jelly Roll" but added a few more strips to make it big enough for my cutting mat. I made the bottom 8 inches and cut a piece of coroplast with rounded corners for the bottom to give it more of a base. This is the first somewhat complex thing I have made so basically I am really happy with how it turned out!
Tuesday, January 21, 2014
The start!
I have just begun learning to quilt and free motion quilt. I am really excited about this because it has been something I have wanted to do for many years now. I have very little sewing experience, other than some very basic repairs and I am really looking forward to this journey and reawakening my creative side. I was in art shop at the vocational high school I attended but I have not really done much artistically since then. I just could not find something I was actually excited about doing, other than painting my jumps (I am an equestrian.) I have created this blog to basically log my progress with sewing and quilting. I am learning in many different ways, one way being watching a lot of online tutorials by Leah Day and the Missouri Star Quilt Company, also participating in Leah Day's Building Block Quilt Along of 2014, taking a local quilting class with some friends and of course, a lot of reading.
Photos of my first blocks for the BBQA with The Free Motion Quilting Project!
Photos of my first blocks for the BBQA with The Free Motion Quilting Project!
And a couple photos just experimenting this evening. I was quilting on the wrong side of the fabric because I could not stand staring at the checked print, so that's why my name is quilted backwards on the dark side, but it is easier to see the stitching on the darker side.
Subscribe to:
Comments (Atom)


